What is a Workspace?
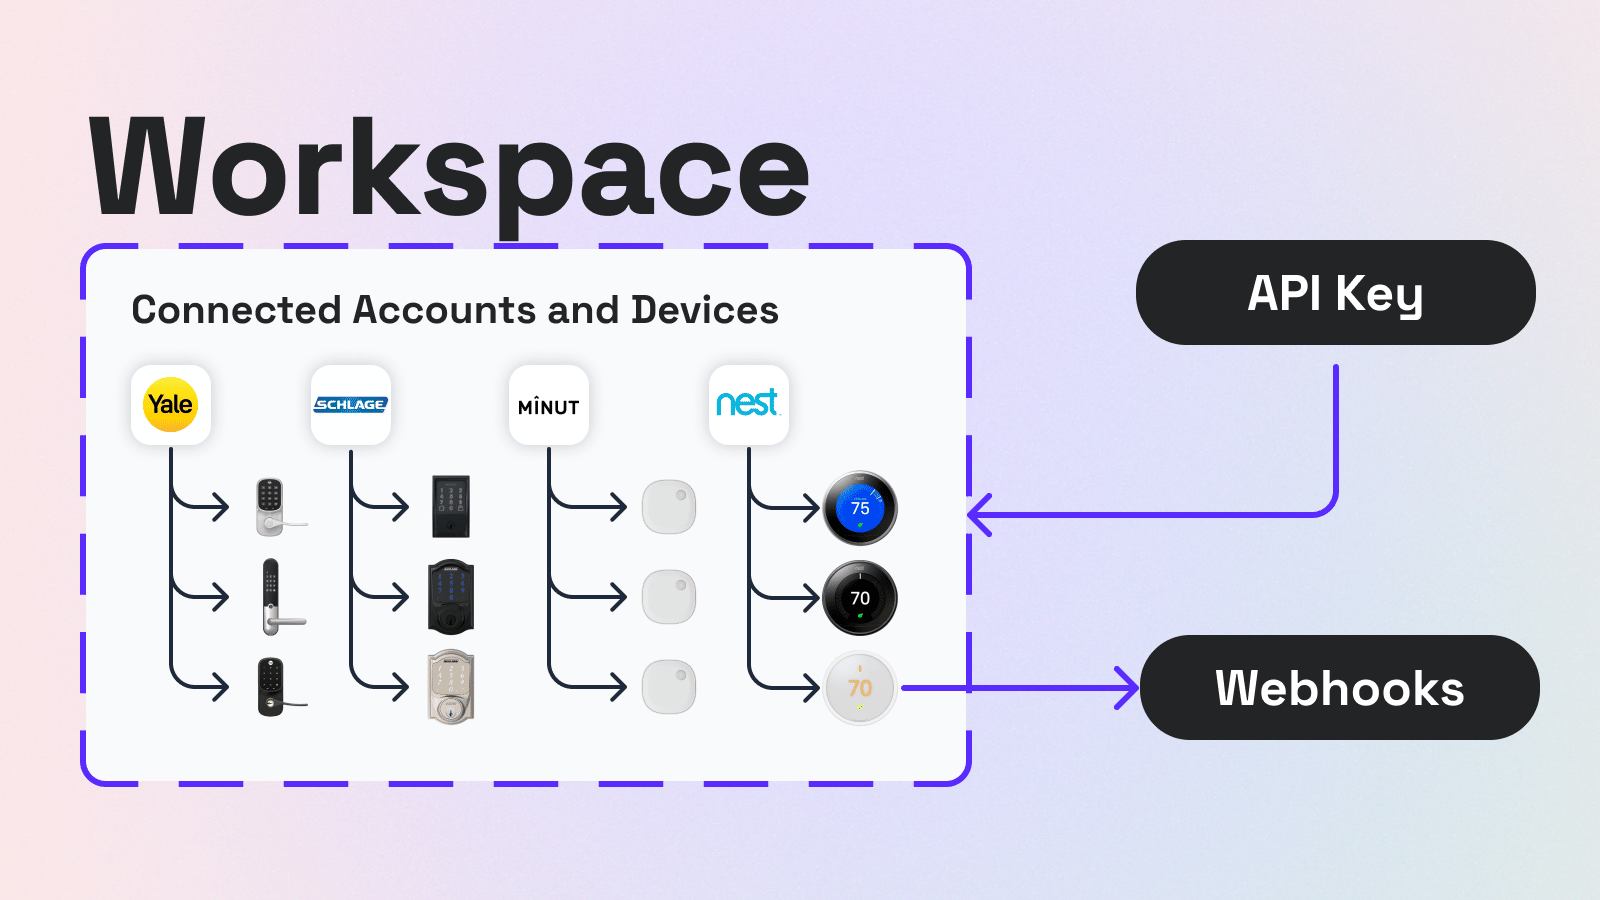
A workspace is conceptually like a project or environment. It encapsulate all other Seam resources, such as devices and connected third-party accounts. You access resources within a workspace using an API key, a Personal Access Token (PAT), or client session tokens, and you can receive events from a workspace using webhooks. There is no limit to the number of workspaces that you can create, but most Seam customers only have the following two workspaces:- One sandbox workspace in which they connect virtual devices to test their apps
- One production workspace in which they connect real devices
Production Workspaces
Production workspaces enable you to connect and control real devices from brands, such as August, Schlage, Ecobee, Google Nest, and more.Create a Production Workspace
-
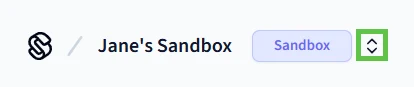
In the upper-left corner of Seam Console, click the workspace switcher to display the workspace list.
- Click New Workspace.
- In the Add a Workspace dialog, type a name for your new workspace and your company name.
-
Disable Sandbox mode.
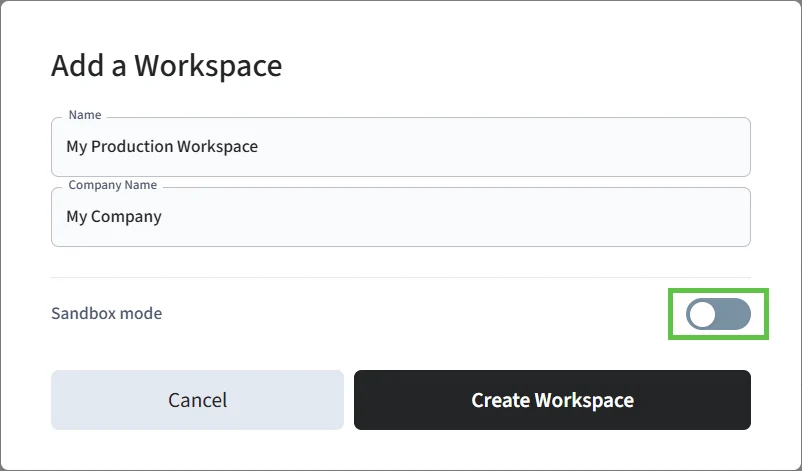
- Click Create Workspace.
Connecting Devices
You can use either of the following two ways to connect devices to a production workspace:- Use Seam Console.
- Use Connect Webviews.
Connect Devices Using Seam Console
- In the top navigation pane of Seam Console, click Devices.
- In the upper-right corner of the Devices page, click Add Devices.
Seam Console displays a Connect Webview (that is, an authorization flow) that enables you to connect a device account to Seam. - In the Connect Webview, click Continue.
- In the manufacturer list, select the manufacturer of the devices that you want to connect.
- Follow the login instructions to authorize these devices.
Connect Devices Using Connect Webviews
If you are creating an application (app) to control your users’ devices, use Connect Webviews. Connect Webviews are fully-embedded client-side components that you add to your app. Your users interact with your embedded Connect Webviews to link their device accounts to Seam through your app. Seam handles all the authentication steps. Once your user has completed the authorization through your app, your users’ devices are linked with your production workspace, and you can access and control their devices using the Seam API.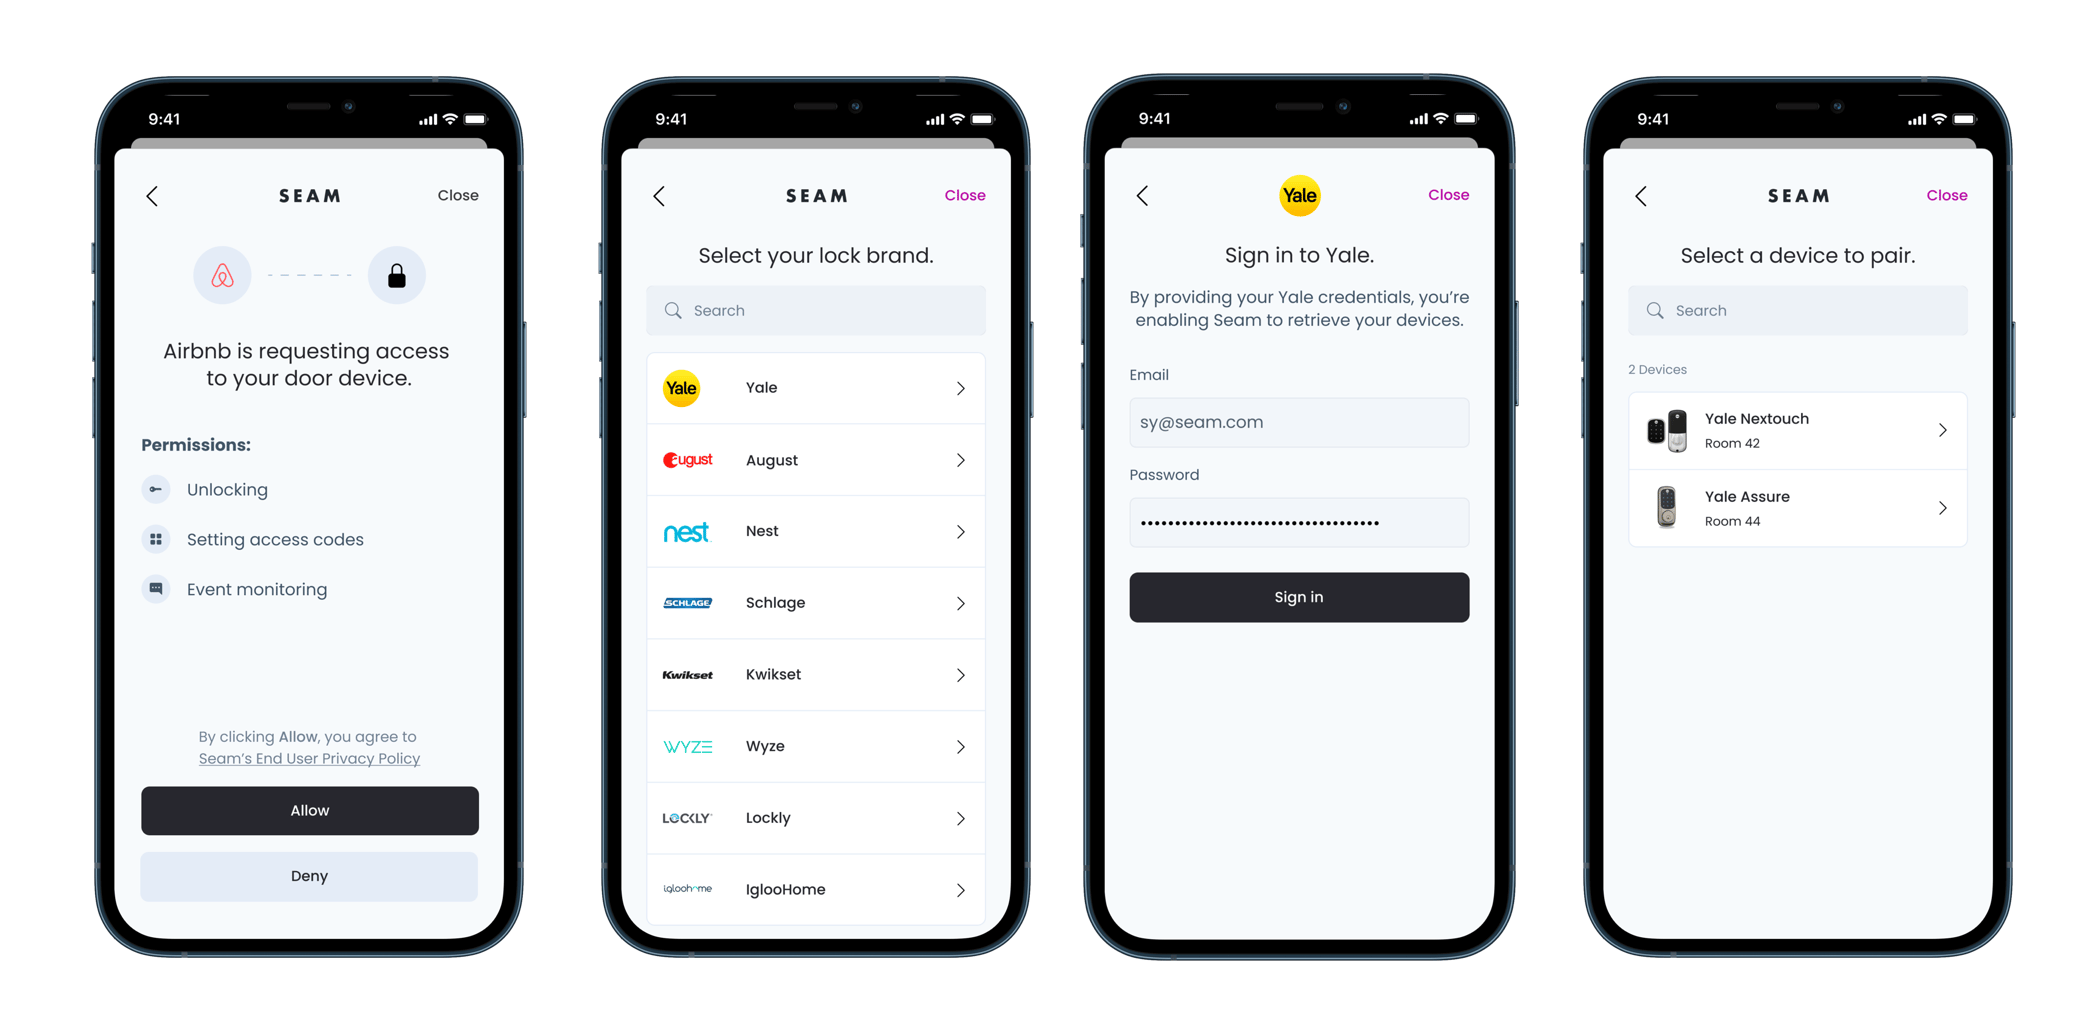
Single Workspace Setup (More Common)
Most Seam customers use a single production workspace to connect all their devices, regardless of whether these devices are ones that they own or they are controlling thousands of end customers’ devices. For example, a property management app with thousands of customers could still use a single production workspace to connect all customers’ devices..png?fit=max&auto=format&n=fXUGiZ2jNb2vLfTW&q=85&s=2cc052b77e8ac087cd2be6ac963e0a0b)
Per-Customer Workspace Setup (Less Common)
Some Seam customers may be developing multiple apps, each of which needs to interact with devices. In this type of scenario, it may be useful to set up a different production workspace for each application. For example, an information technology (IT) firm that builds custom apps for its customers will most likely want to create a separate workspace for each customer. This model can simplify security, support, and billing. Occasionally, an app may also be using multiple Seam workspaces. For example, a restaurant chain providing a management dashboard for its franchisees may want to use a different Seam workspace for each franchisee to simplify billing and support. See App 3 in the following diagram:
Note that when you use multiple workspaces, you either need to create an API
key for each workspace or create a single
Personal Access Token (PAT) for
use with all workspaces and then specify the ID of the workspace that you want
to access.
Sandbox Workspaces
Sandbox workspaces are a special type of workspace designed for testing code. Sandbox workspaces offer test device accounts and virtual devices that you can connect and control. This ability to work with virtual devices is quite handy because it removes the need to own physical devices from multiple brands. Importantly, virtual devices behave identically to the corresponding real devices. That is, if your app works with a virtual device in a sandbox workspace, it will also work with a real device in a production workspace.You can only connect virtual devices in a sandbox workspace. To connect a real
device, switch to a production workspace.
Create a Sandbox Workspace
-
In the upper-left corner of Seam Console, click the workspace switcher to display the workspace list.
- Click New Workspace.
- In the Add a Workspace dialog, type a name for your new workspace and your company name.
- Enable Sandbox mode.
- Click Create Workspace.
Connecting Virtual Devices
To connect virtual devices, specify the login credentials for test device accounts in the Seam Console or in Connect Webviews within your apps. All manufacturers and devices that Seam supports have one or more sandbox test accounts with pre-seeded devices. For login credentials for all test device accounts, see Test Accounts.Interacting with a Virtual Device
You can trigger test events for some virtual devices. This capability is useful for testing code that depends on receiving event notifications from the Seam API. For example, virtual noise sensor devices, such as Minut, provide the ability to trigger a “noise event” that emits an event to your webhook endpoint. Once you have triggered an event, you can view this even on the Events tab for the virtual device.- In the top navigation pane of the Seam Console, click Devices.
- In the Devices table, click the device with which you want to interact.
- Click the Actions tab.
The Actions tab lists the actions that you can perform on this virtual device. - Click the desired action, as applicable for that action.
For example:- For a virtual door lock, click Locked to lock or unlock the lock.
- For a virtual thermostat, click Edit and then modify the climate or fan setting.
- For a virtual noise sensor, click Trigger to trigger a noise threshold alert.
- Click the Events tab for the device.
The Events tab displays events for the device.
Testing Your App
To help you test your app against events—like device disconnection or removal—that are difficult to orchestrate in a QA environment using real devices, Seam provides a suite ofsimulate endpoints that you can use in a sandbox workspace. See Testing Your App Against Device Disconnection and Removal.
Resetting Sandbox Workspaces
Sandbox workspace are unique in that you can reset them to the original starting state. For example, if you need to run complex continuous integration (CI) testing for an app, you can reset the sandbox workspace after each individual test run. You can reset a sandbox workspace either manually through Seam Console or programmatically using the Seam API. For detailed information about resetting a sandbox workspace through the Seam API, see the Reset a Sandbox Workspace API reference.Reset a Sandbox Workspace Using Seam Console
-
In the upper-left corner of Seam Console, click the workspace switcher to display the workspace list.
-
Select the name of the sandbox workspace that you want to reset.
Seam Console switches to the selected sandbox workspace. - In the top navigation pane of Seam Console, click Settings.
-
At the upper-right corner of the Workspace Settings page, click
 and then select Reset Sandbox.
- Click Reset Workspace to confirm the reset.
Reset a Sandbox Workspace Using the Seam API
Sharing Workspaces
You can add teammates to your workspace.-
In the upper-left corner of Seam Console, click the workspace switcher to display the workspace list.
-
Select the name of the workspace that you want to share.
Seam Console switches to the selected workspace. - In the left navigation pane, click Team.
- In the upper-right corner of the Team page, click Add member.
- In the Add Organization Member dialog, type the email address of the teammate that you want to add to this workspace.
- Click Add to Team.