What is a User Identity?
Seam user identities are a feature for tracking and managing user accounts in your application. This feature assigns unique identifiers to each of your users, enabling you to issue and manage their mobile credentials and access permissions. Each user identity is mapped to a user account in your app.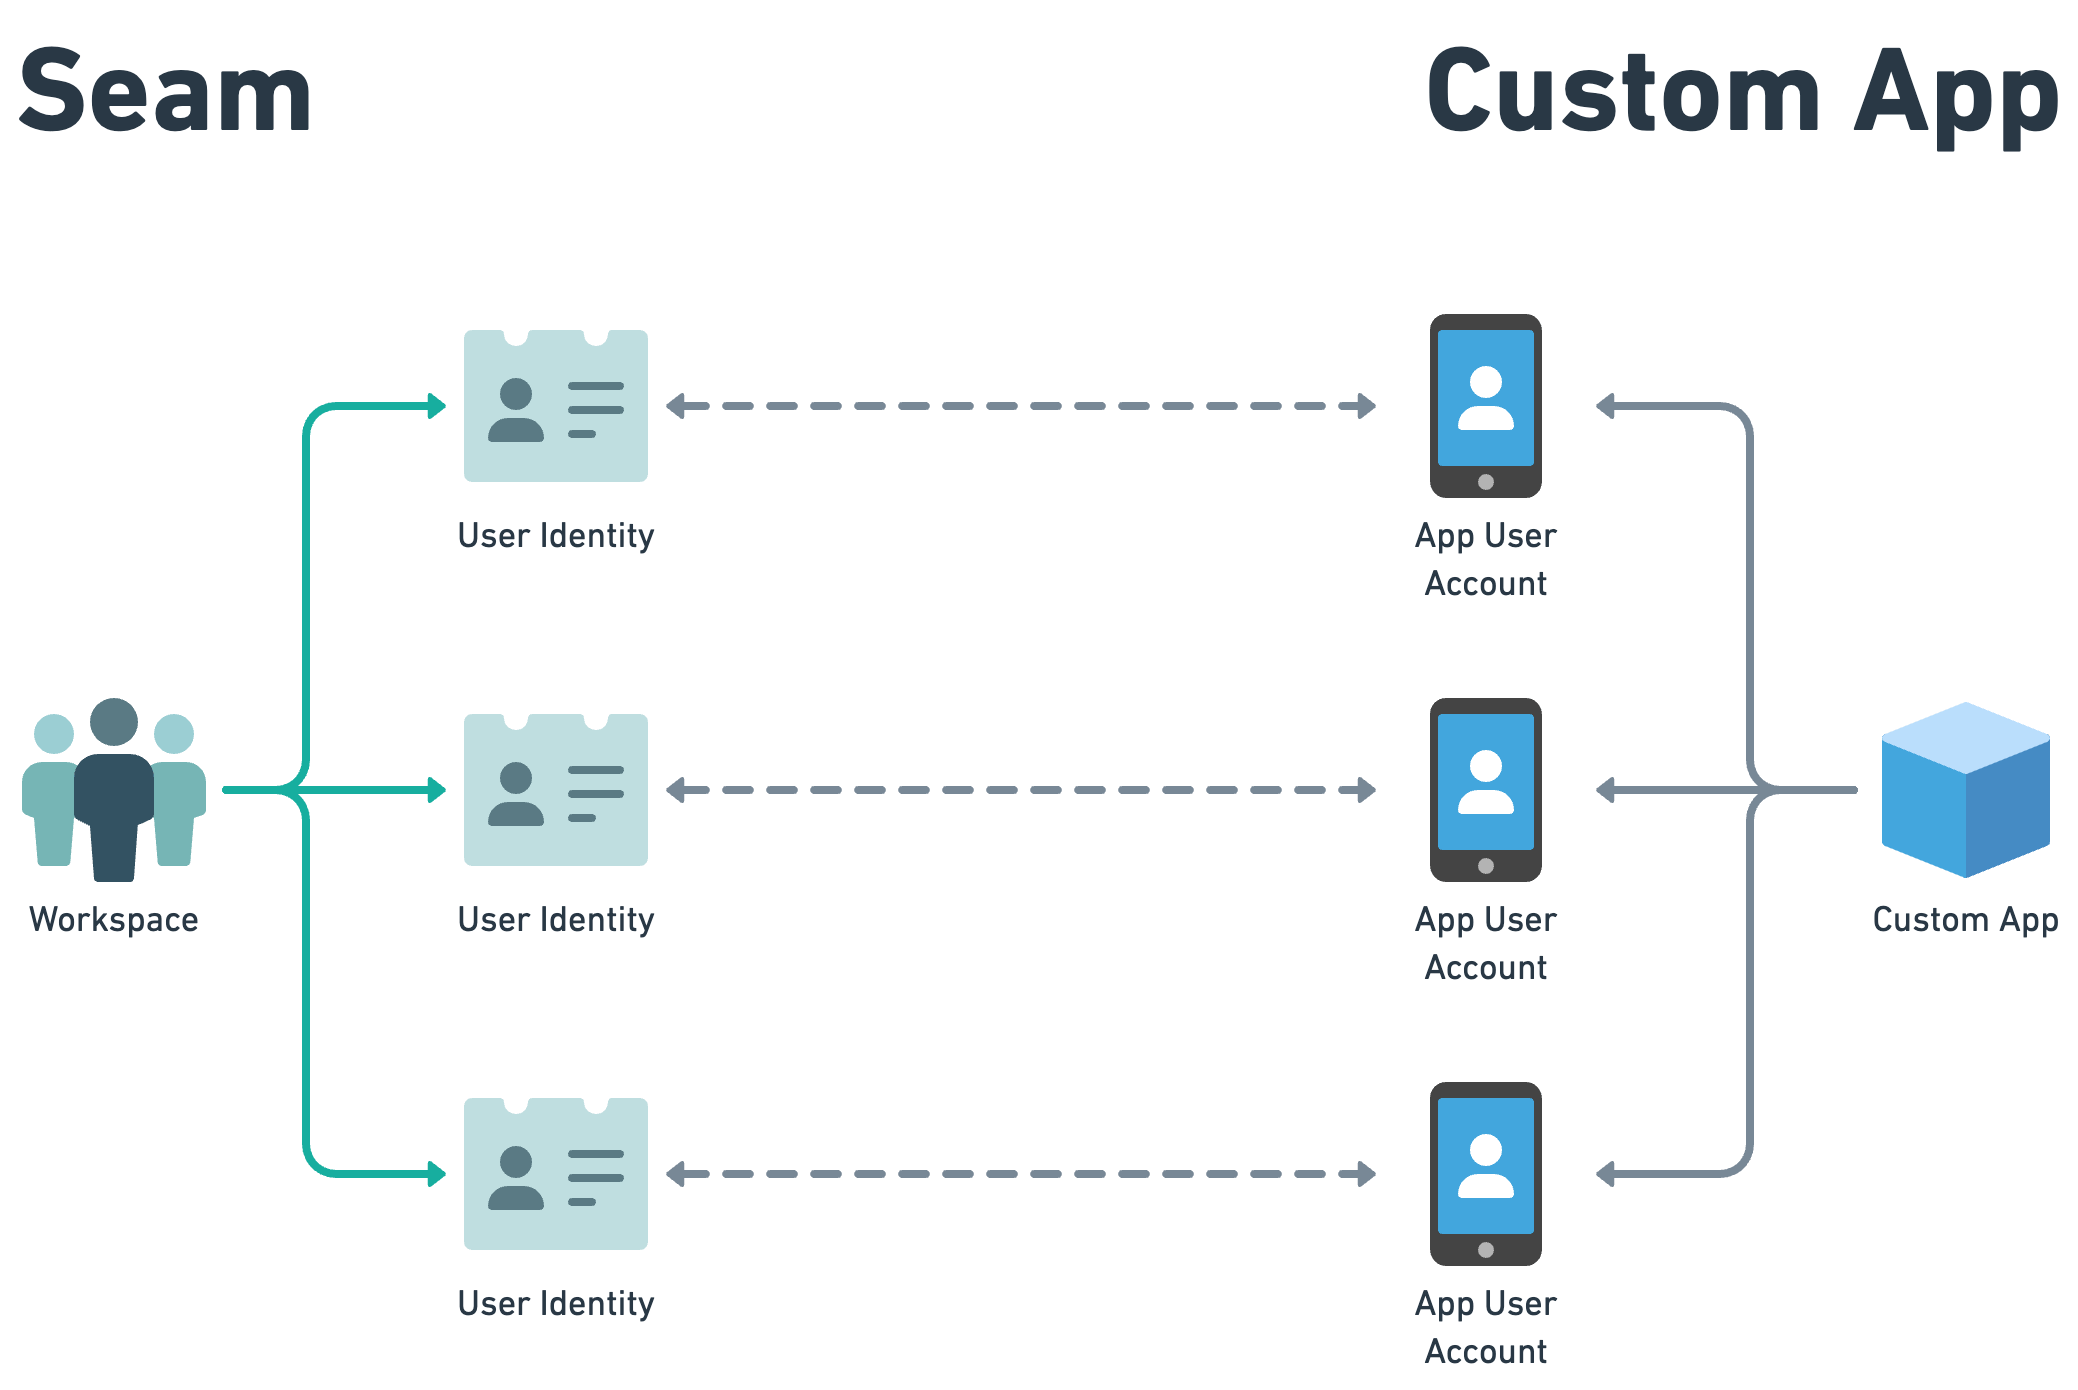
User Identities Can Be Connected to Users in Multiple Access Control Systems
User identities can be linked to one ACS user in each access control system. Any mobile credentials issued to these ACS users are consolidated under the user identity. Consequently, a user’s mobile app account has access to these credentials through the user identity.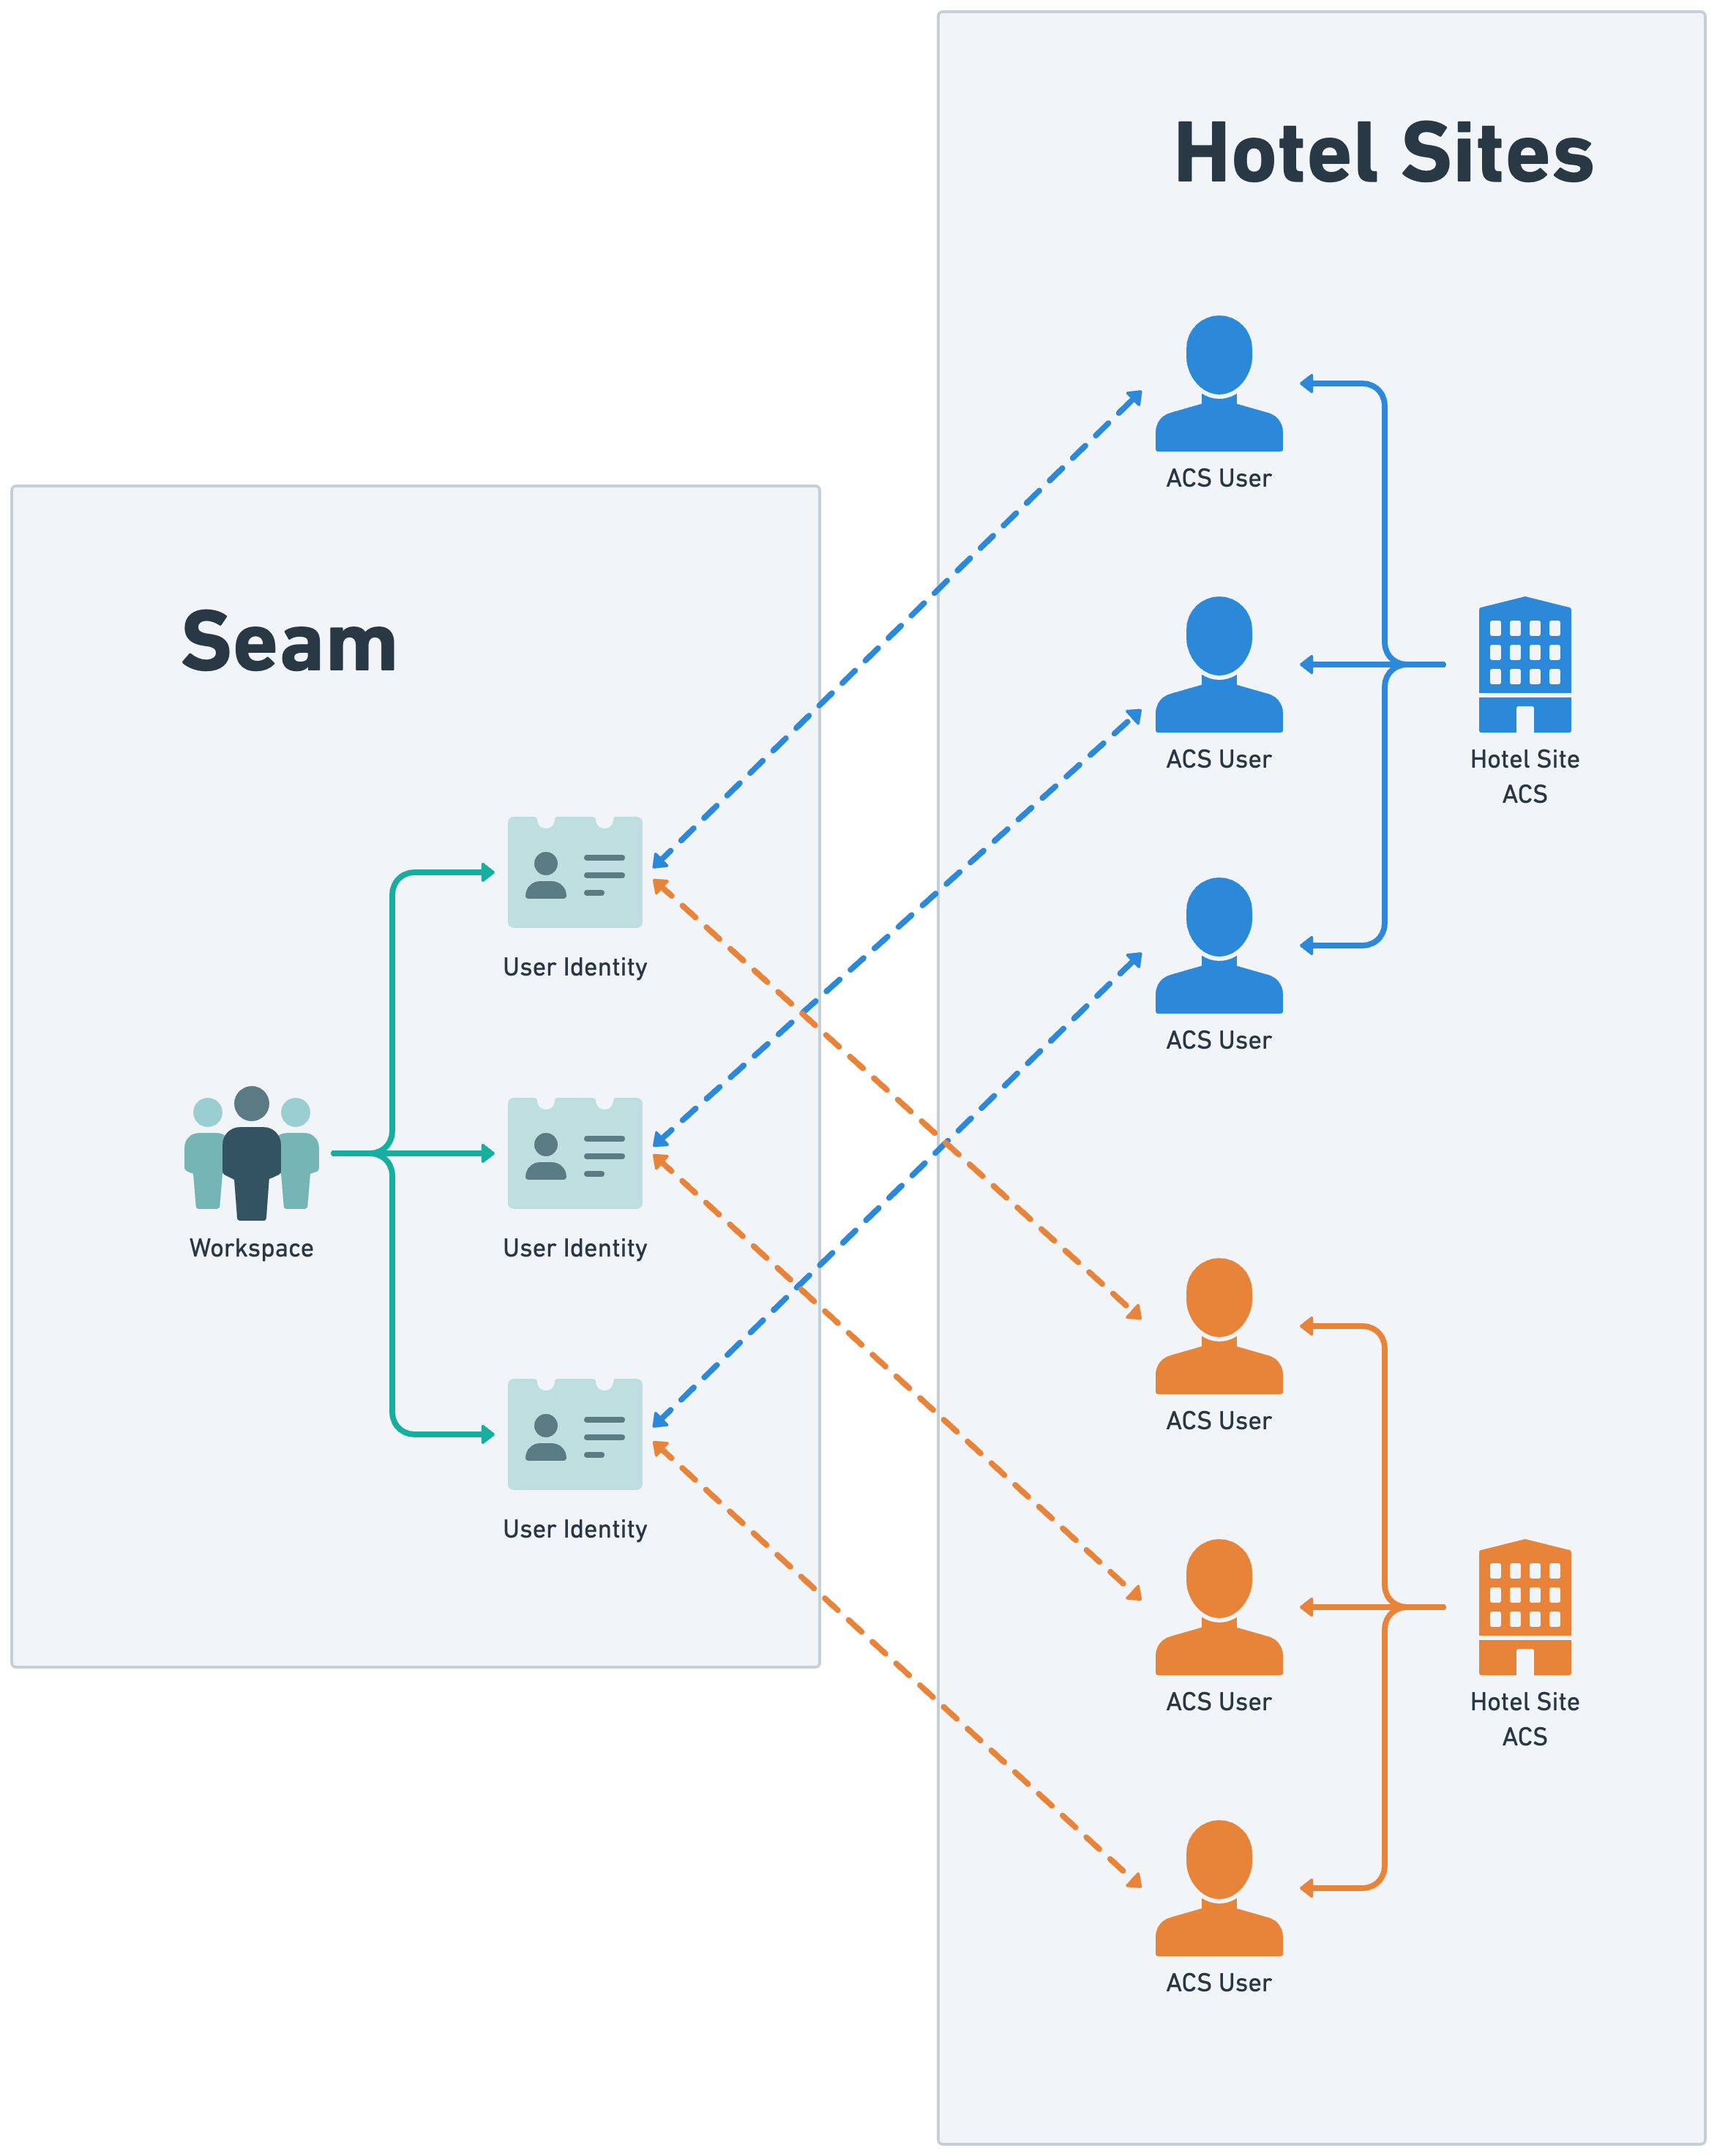
Create a User Identity and Associate it with an ACS User
1. Create a User Identity
To create a user identity, you can specify any of the following characteristics:- Unique user identity key (
user_identity_key) - Unique email address (
email_address) - Unique phone number (
phone_number) - Full name (
full_name)
user_identity_key, email_address, or phone_number, each of these values must be unique within your workspace.
Command: