# Make a Supported Devices Page
## Overview
Seam adds supports for smart devices every week and by integrating with Seam, you get access to these new devices too!
This guide will show you how to add a [supported device table](https://react.seam.co/?path=/docs/components-supporteddevicetable--docs) to your website or application. You can use plain HTML, React, or any framework that supports web components.
## 1 - Get a Publishable Key from the Seam Console
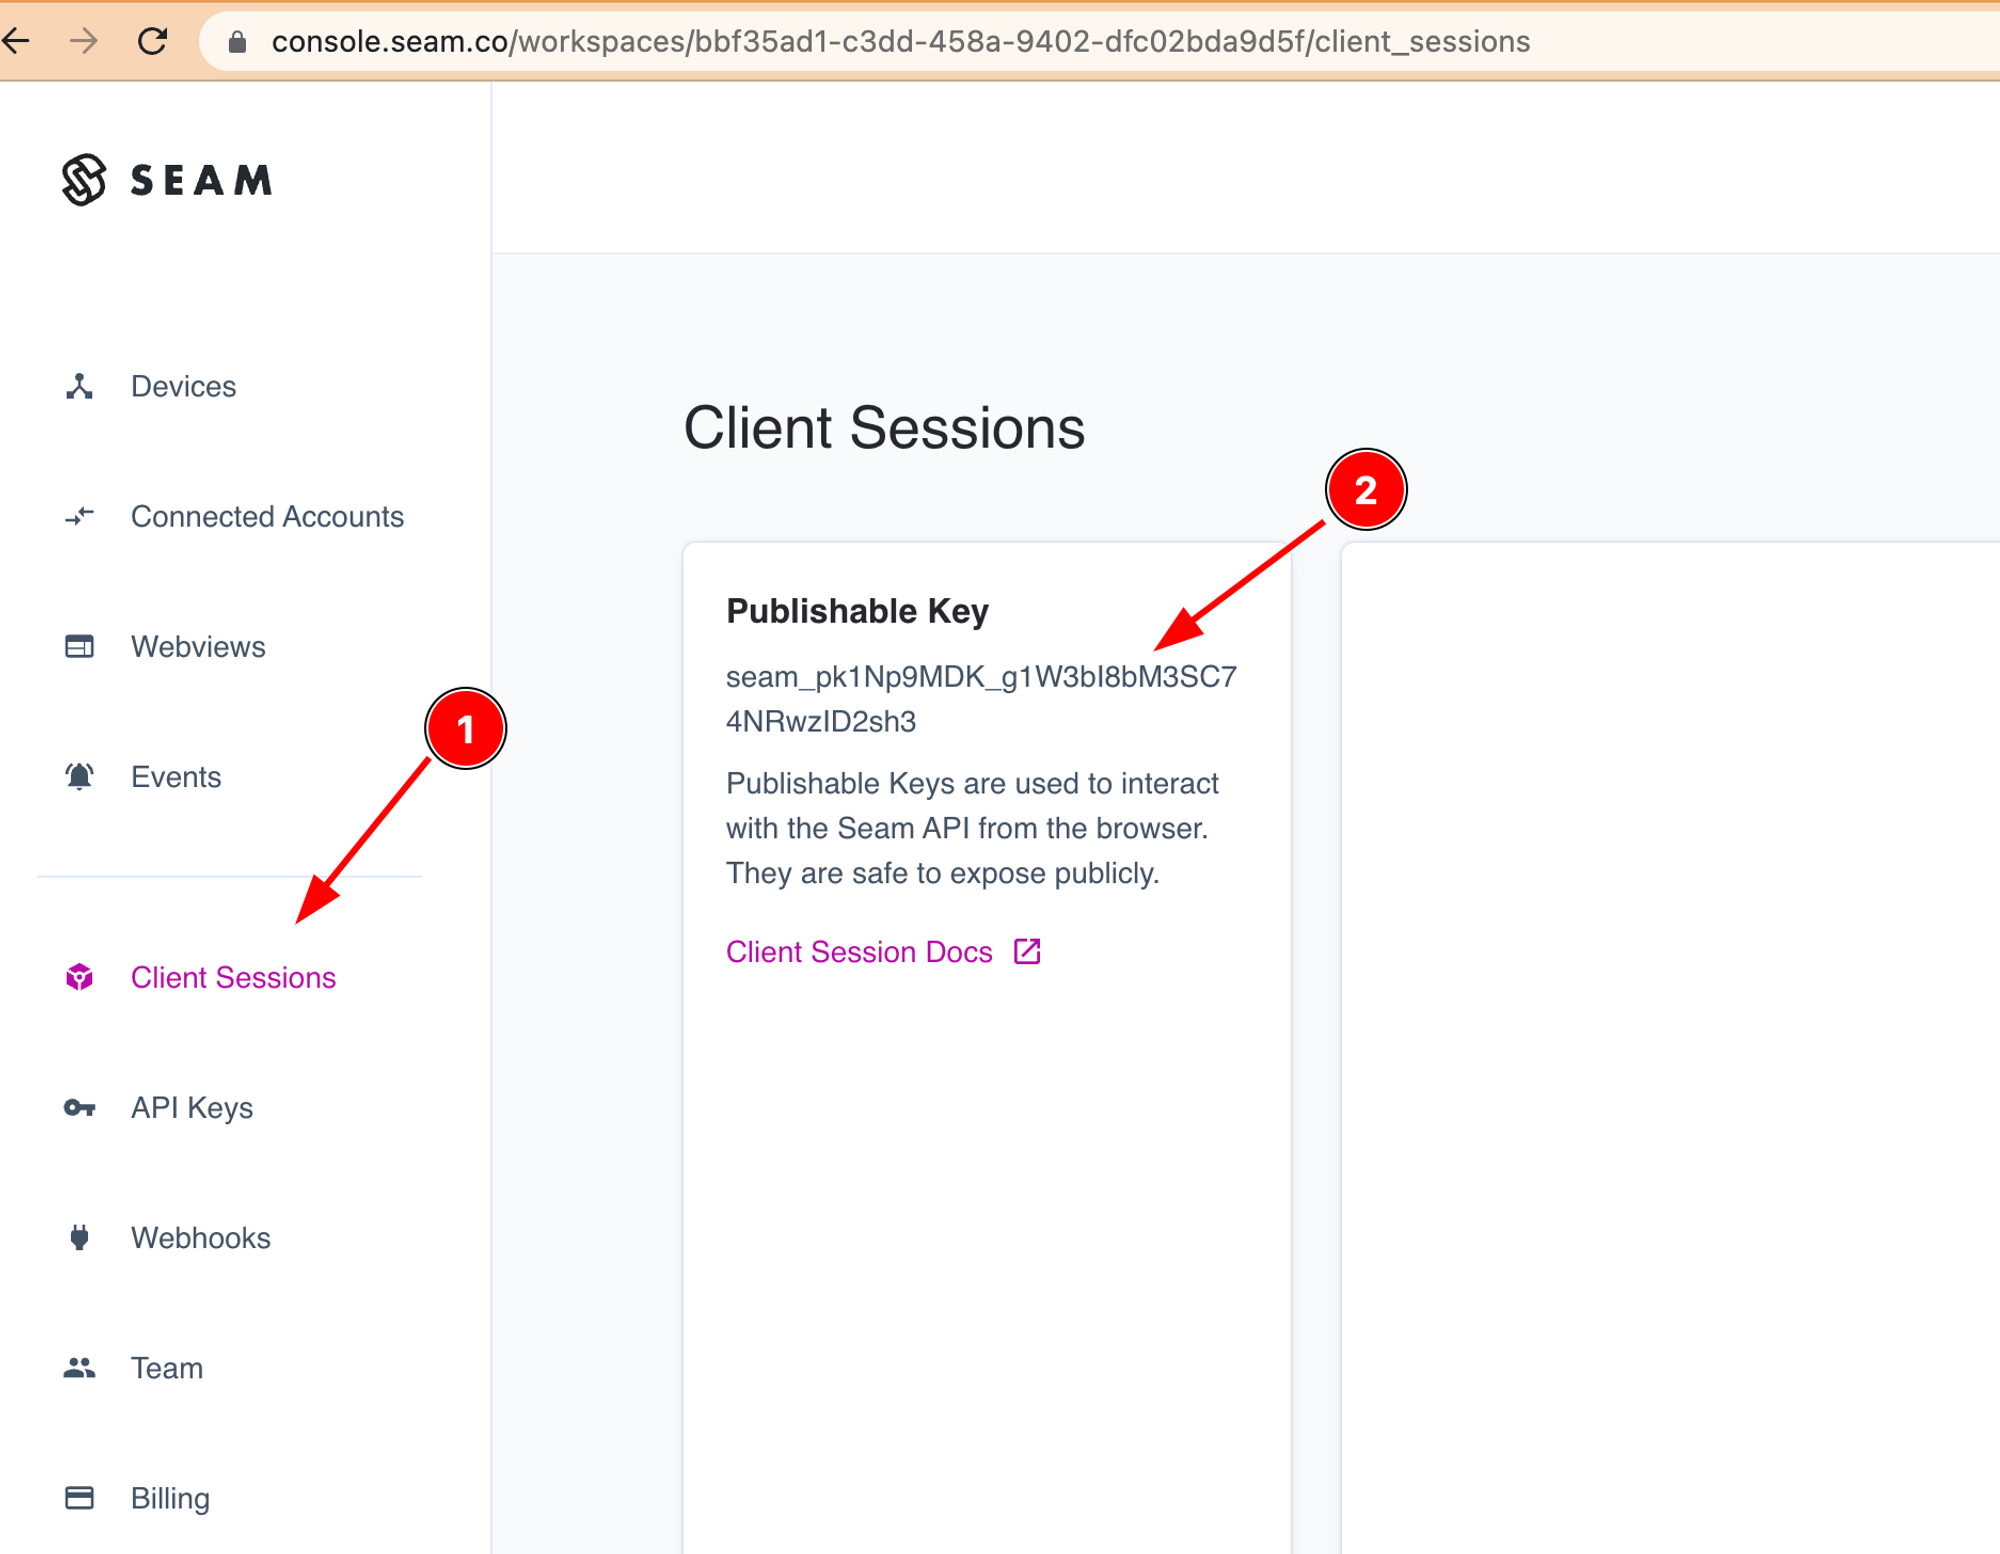
To access the Seam API, you'll need a publishable key. This key identifies your application when making requests to Seam and is safe to embed in your frontend code.
Go to [console.seam.co](https://console.seam.co) and select "Client Sessions" from the sidebar. You should then see a "Publishable Key" that you can copy.
## 2 — Add Seam Components
{% tabs %}
{% tab title="Plain HTML" %}
Seam Components are implemented in React, but may be used as native web components.
Create a plain HTML page with the content below. You can serve this anyway you like, or even open it directly in your browser. The version in the script tag can be any [released version](https://github.com/seamapi/react/releases).
```html
Seam Components
```
{% endtab %}
{% tab title="React" %}
Install `@seamapi/react` in your React application
```bash
npm install --save @seamapi/react
```
Add the components anywhere in your React app
```javascript
import { SupportedDeviceTable, SeamProvider } from "@seamapi/react"
export const App = () => {
return (
)
}
```
{% endtab %}
{% tab title="Any JavaScript Framework" %}
Install `@seamapi/react` in your application
```bash
npm install --save @seamapi/react
```
Then import the custom elements bundle in your application entrypoint:
```javascript
import "@seamapi/react/elements.js"
```
Add the components where your framework renders HTML. Some frameworks may require additional configuration to enable web component support, e.g., [Angular](https://docs.seam.co/latest/~/revisions/DFdrUdS2jQOnbJTNDT5a/ui-components/overview/getting-started-with-seam-components/angular) or [Vue](https://docs.seam.co/latest/~/revisions/DFdrUdS2jQOnbJTNDT5a/ui-components/overview/getting-started-with-seam-components/vue).
```html
```
{% endtab %}
{% endtabs %}
You should see a list of device models like what's shown below:
## Next Steps
* View and play with other components in the [interactive storybook component library](https://react.seam.co/)
* Check out some [Full Example Apps](https://github.com/seamapi/react/tree/main/examples)
If you have any questions or want to report an issue, email us at .