> ## Documentation Index
> Fetch the complete documentation index at: https://docs.seam.co/llms.txt
> Use this file to discover all available pages before exploring further.
# Preview the customer portal in Console
> Preview how Customer Portals work and experiment with the API by setting up a temporary portal directly from the Seam Console.
You can set up a customer portal directly from the Seam Console. These Console-generated portals are intended as an **API exploration playground** — they let you preview how portals work and experiment with the API before building your integration.
**Important:** Portal links created in Console are temporary. They expire
after 7 days and should not be used in production. For real-world usage,
always generate portals programmatically using the API.
***
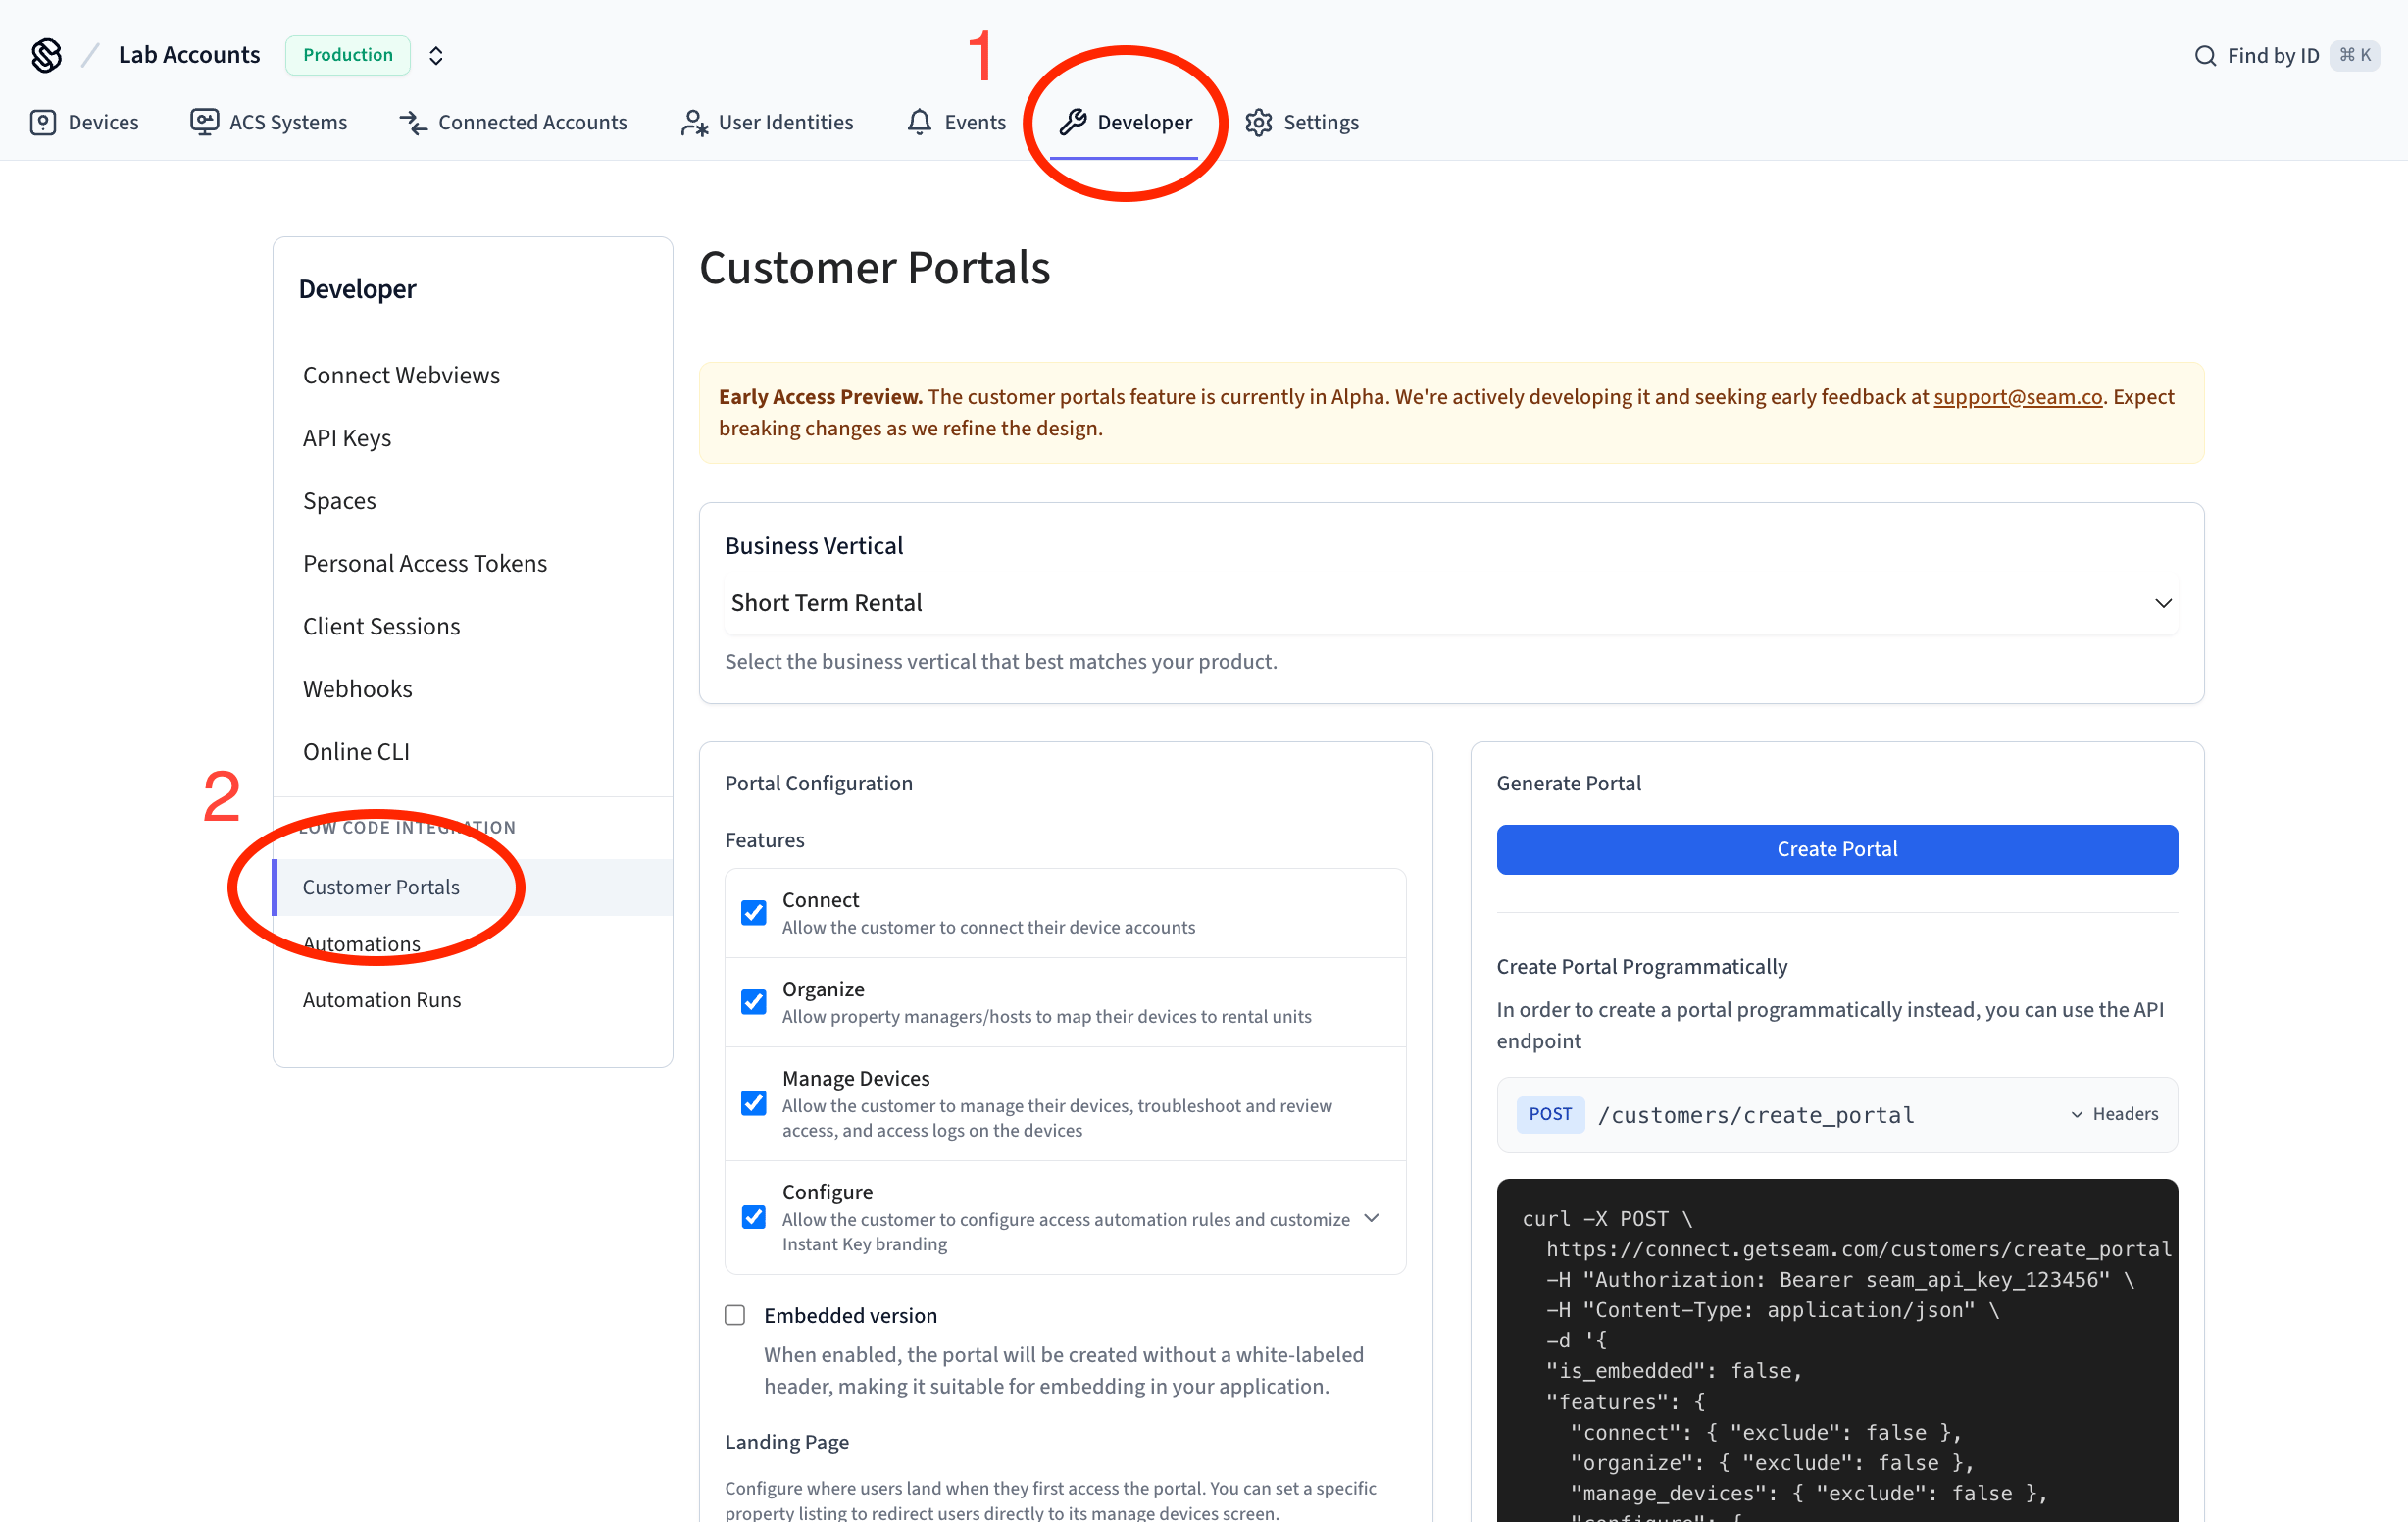
### 1. Open the Customer Portals page
From the Console, navigate to **Developer** → **Customer Portals** from the top navigation bar.
 ***
### 2. Select your business verticals
Choose the vertical that best matches your product (for example, *Short Term Rental*). This setting does two things:
1. Preconfigures recommended defaults for your use case.
2. Updates the labels in the portal UI so they use industry-specific terms your customers expect.
For example:
* In the Hospitality vertical, the generic Seam concept of a *Space* appears in the portal as a *Room*.
* In Multi-family, *Spaces* appear as *Units*.
* In Gym Management, they appear as *Facilities*.
***
### 2. Select your business verticals
Choose the vertical that best matches your product (for example, *Short Term Rental*). This setting does two things:
1. Preconfigures recommended defaults for your use case.
2. Updates the labels in the portal UI so they use industry-specific terms your customers expect.
For example:
* In the Hospitality vertical, the generic Seam concept of a *Space* appears in the portal as a *Room*.
* In Multi-family, *Spaces* appear as *Units*.
* In Gym Management, they appear as *Facilities*.
.png?fit=max&auto=format&n=cEb0qDa-sehX_yKT&q=85&s=a310aee3db7da0aa7628ef99525f9ffa) Here's a complete reference of how Seam concepts map to industry-specific labels across verticals:
| Vertical | User Identity | Spaces | Bookings |
| --------------------- | ------------- | ------------------- | ------------ |
| **Short Term Rental** | Guest | Property listings | Reservations |
| **Multi-family** | Tenant | Units, Common areas | Leases |
| **Hospitality** | Guest | Rooms, Common areas | Bookings |
| **Gym Management** | Member | Facilities | Memberships |
| **Property Tours** | Visitor | Tour spaces | Bookings |
| **Neutral** | User Identity | Spaces | Bookings |
***
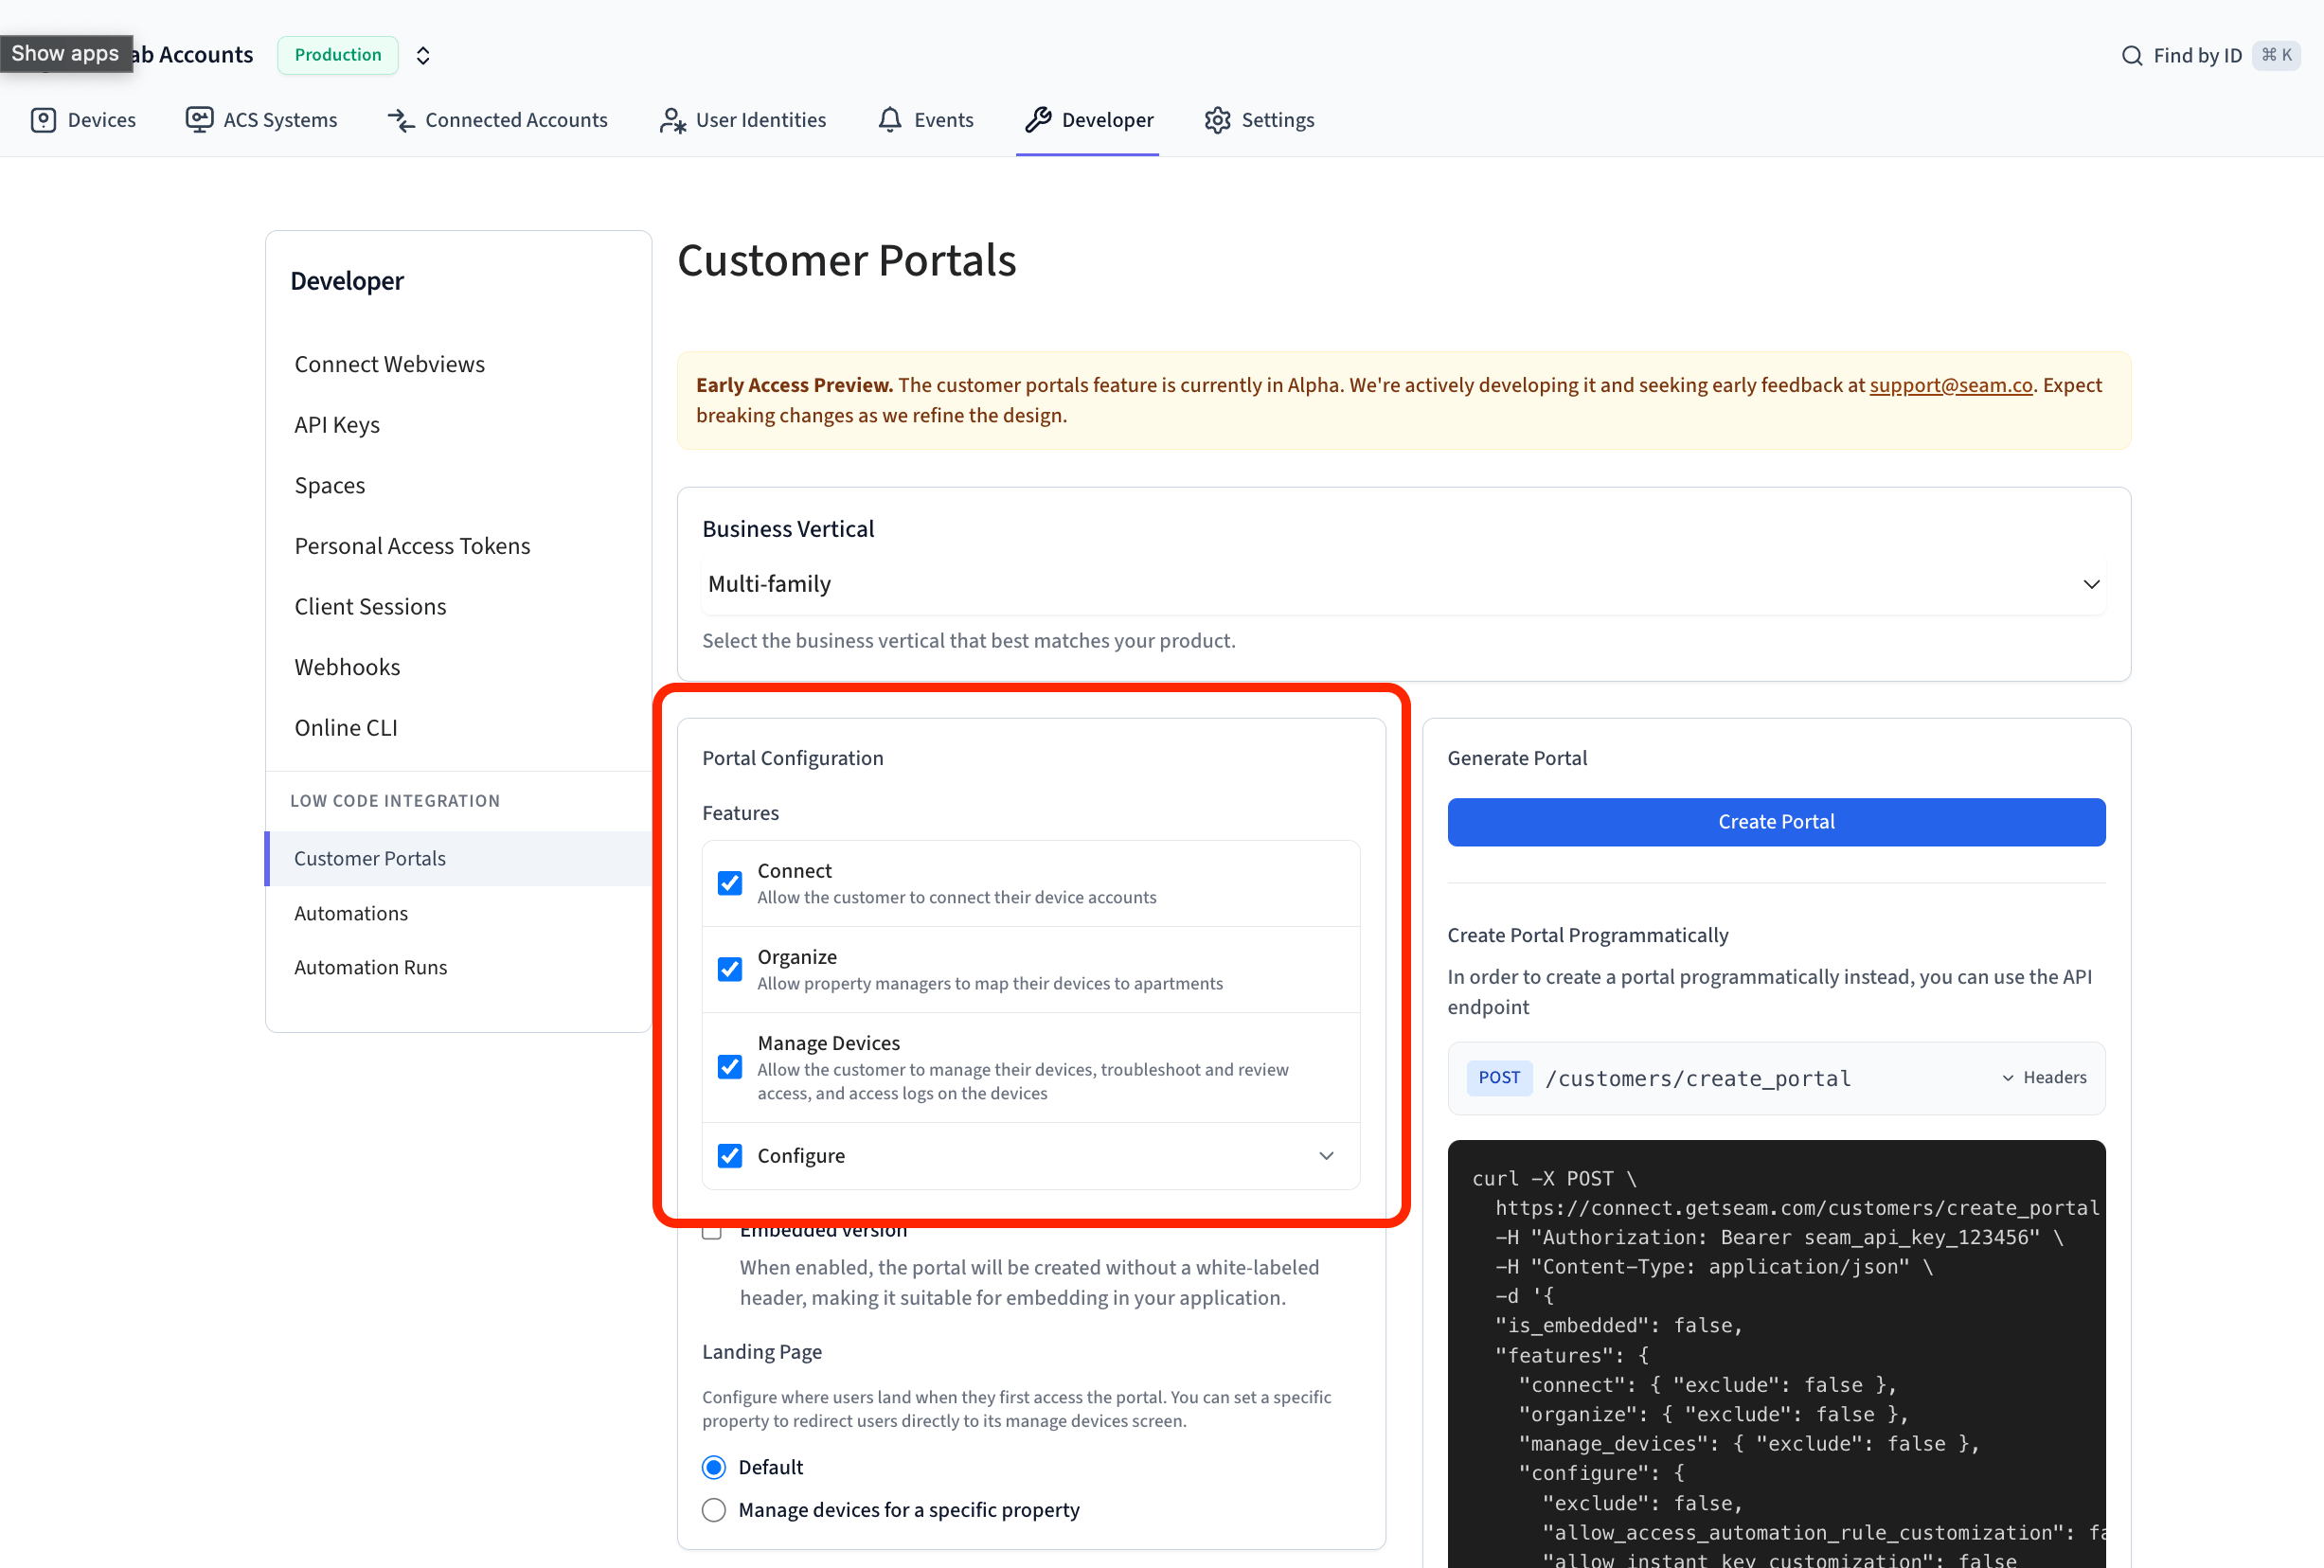
### 3. Configure portal features
Under **Portal Configuration**, select which features to enable:
* **Connect** – allow customers to connect their device accounts.
* **Organize** – let customers map devices to rental units, rooms, or spaces.
* **Manage Devices** – give customers tools to manage devices, troubleshoot, and view logs.
* **Configure** – allow customers to set automation rules and customize Instant Key branding.
Here's a complete reference of how Seam concepts map to industry-specific labels across verticals:
| Vertical | User Identity | Spaces | Bookings |
| --------------------- | ------------- | ------------------- | ------------ |
| **Short Term Rental** | Guest | Property listings | Reservations |
| **Multi-family** | Tenant | Units, Common areas | Leases |
| **Hospitality** | Guest | Rooms, Common areas | Bookings |
| **Gym Management** | Member | Facilities | Memberships |
| **Property Tours** | Visitor | Tour spaces | Bookings |
| **Neutral** | User Identity | Spaces | Bookings |
***
### 3. Configure portal features
Under **Portal Configuration**, select which features to enable:
* **Connect** – allow customers to connect their device accounts.
* **Organize** – let customers map devices to rental units, rooms, or spaces.
* **Manage Devices** – give customers tools to manage devices, troubleshoot, and view logs.
* **Configure** – allow customers to set automation rules and customize Instant Key branding.
 ***
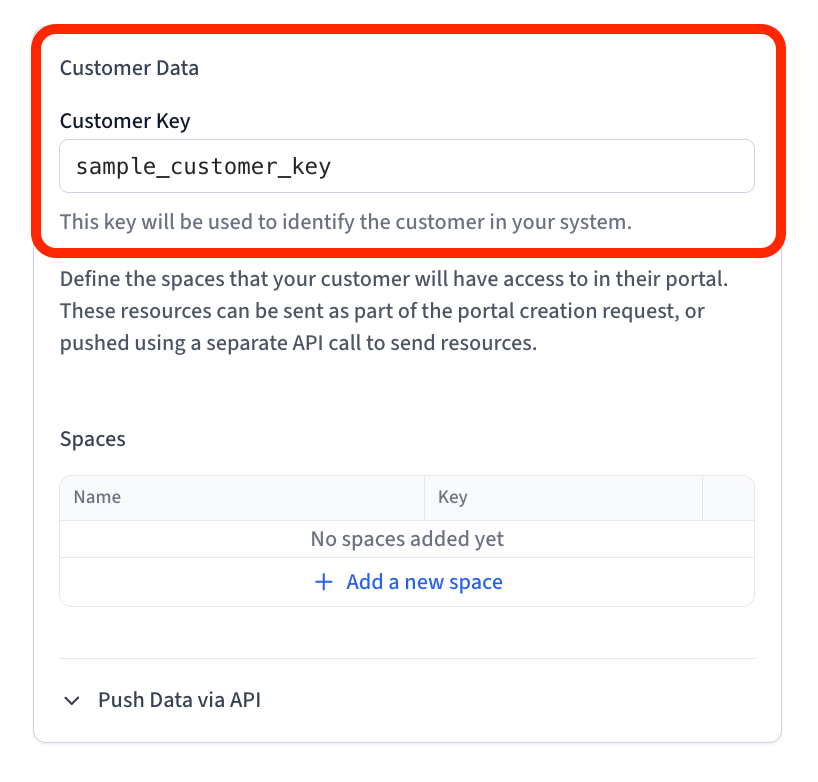
### 4. Enter your `customer_key`
Add the customer\_key for the customer this portal belongs to. Seam uses this key to scope the portal to only that customer’s devices and accounts.
***
### 4. Enter your `customer_key`
Add the customer\_key for the customer this portal belongs to. Seam uses this key to scope the portal to only that customer’s devices and accounts.
 ***
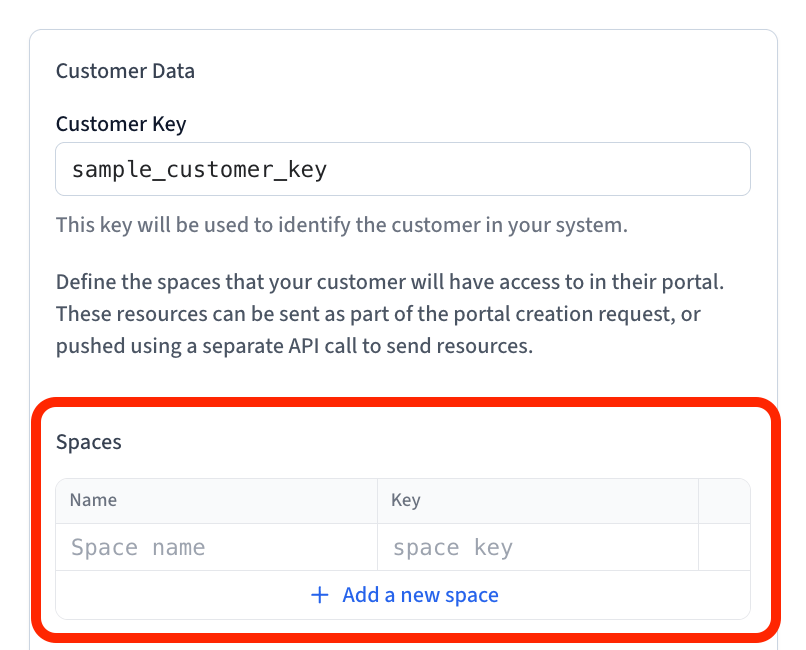
### 5. (Optional) Set up Spaces
This step is required only if you enable the Organize feature.
* Spaces represent the real-world units your customer manages—for example, *Room 101* in a hotel, *Unit A* in an apartment building, or *Studio 3* in a gym.
* Create a Space for each unit your customer manages.
* Use a `space_key` that matches your own system’s identifier (for example, `room-101-id`).
**Reminder:** Even if the portal shows “Rooms” or “Units,” these all map back
to Spaces in Seam.
***
### 5. (Optional) Set up Spaces
This step is required only if you enable the Organize feature.
* Spaces represent the real-world units your customer manages—for example, *Room 101* in a hotel, *Unit A* in an apartment building, or *Studio 3* in a gym.
* Create a Space for each unit your customer manages.
* Use a `space_key` that matches your own system’s identifier (for example, `room-101-id`).
**Reminder:** Even if the portal shows “Rooms” or “Units,” these all map back
to Spaces in Seam.
 ***
### 6. Generate the portal
Click **Create Portal**. Seam generates a temporary portal URL you can use to preview the portal.
**Note:** All portal links expire after 7 days. For production, always
generate portals programmatically, each time a customer needs access.
***
### 6. Generate the portal
Click **Create Portal**. Seam generates a temporary portal URL you can use to preview the portal.
**Note:** All portal links expire after 7 days. For production, always
generate portals programmatically, each time a customer needs access.
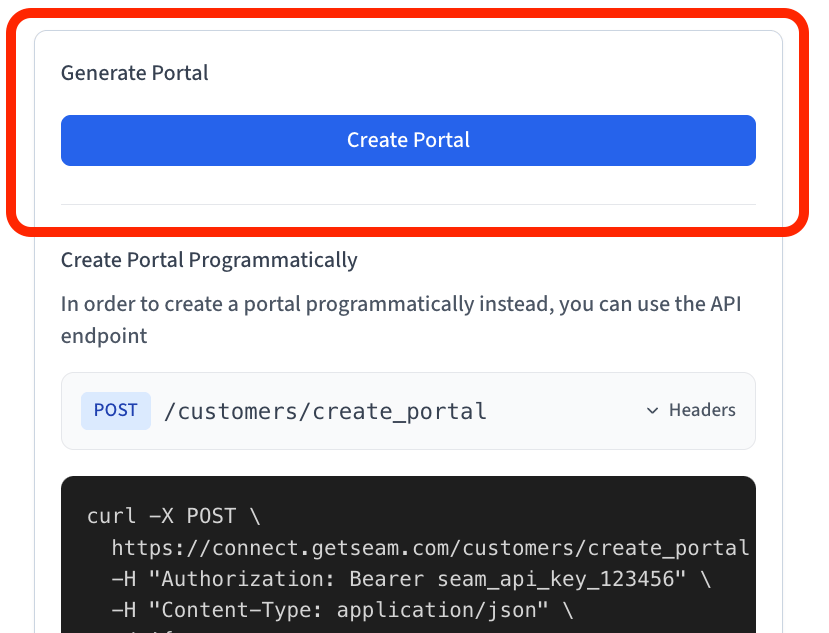 ***
### Next step: Generate portals programmatically with the API
In production, portals must be generated with the API so that they can be refreshed whenever a customer needs access. On the next page, we’ll cover how to create portals programmatically using the `create_portal` endpoint.
***
### Next step: Generate portals programmatically with the API
In production, portals must be generated with the API so that they can be refreshed whenever a customer needs access. On the next page, we’ll cover how to create portals programmatically using the `create_portal` endpoint.